
Welcome to the third article of our deep dive designed to help you learn all you need to enjoy flight simulation and Microsoft Flight Simulator.
As we mentioned in our introduction, for now, we’ll be focusing on Microsoft Flight Simulator, as it’s the easiest entry point into the genre. In due course, we’ll touch on other simulators like DCS World and X-Plane 12. Yet, the content of today’s article can easily be applied to any flight simulator.
One of the first hurdles you’ll face when you start up a flight simulator is learning your basic instruments and understanding what they’re telling you. The information they provide is pretty much your lifeline.
I’m positive that many novices to the genre had their first impact with it by starting a flight already in the air, finding themselves staring at a bunch of relatively obscure gauges and needles, not understanding what they mean, and quite inevitably ending up stalling or overspeeding with fatal consequences.
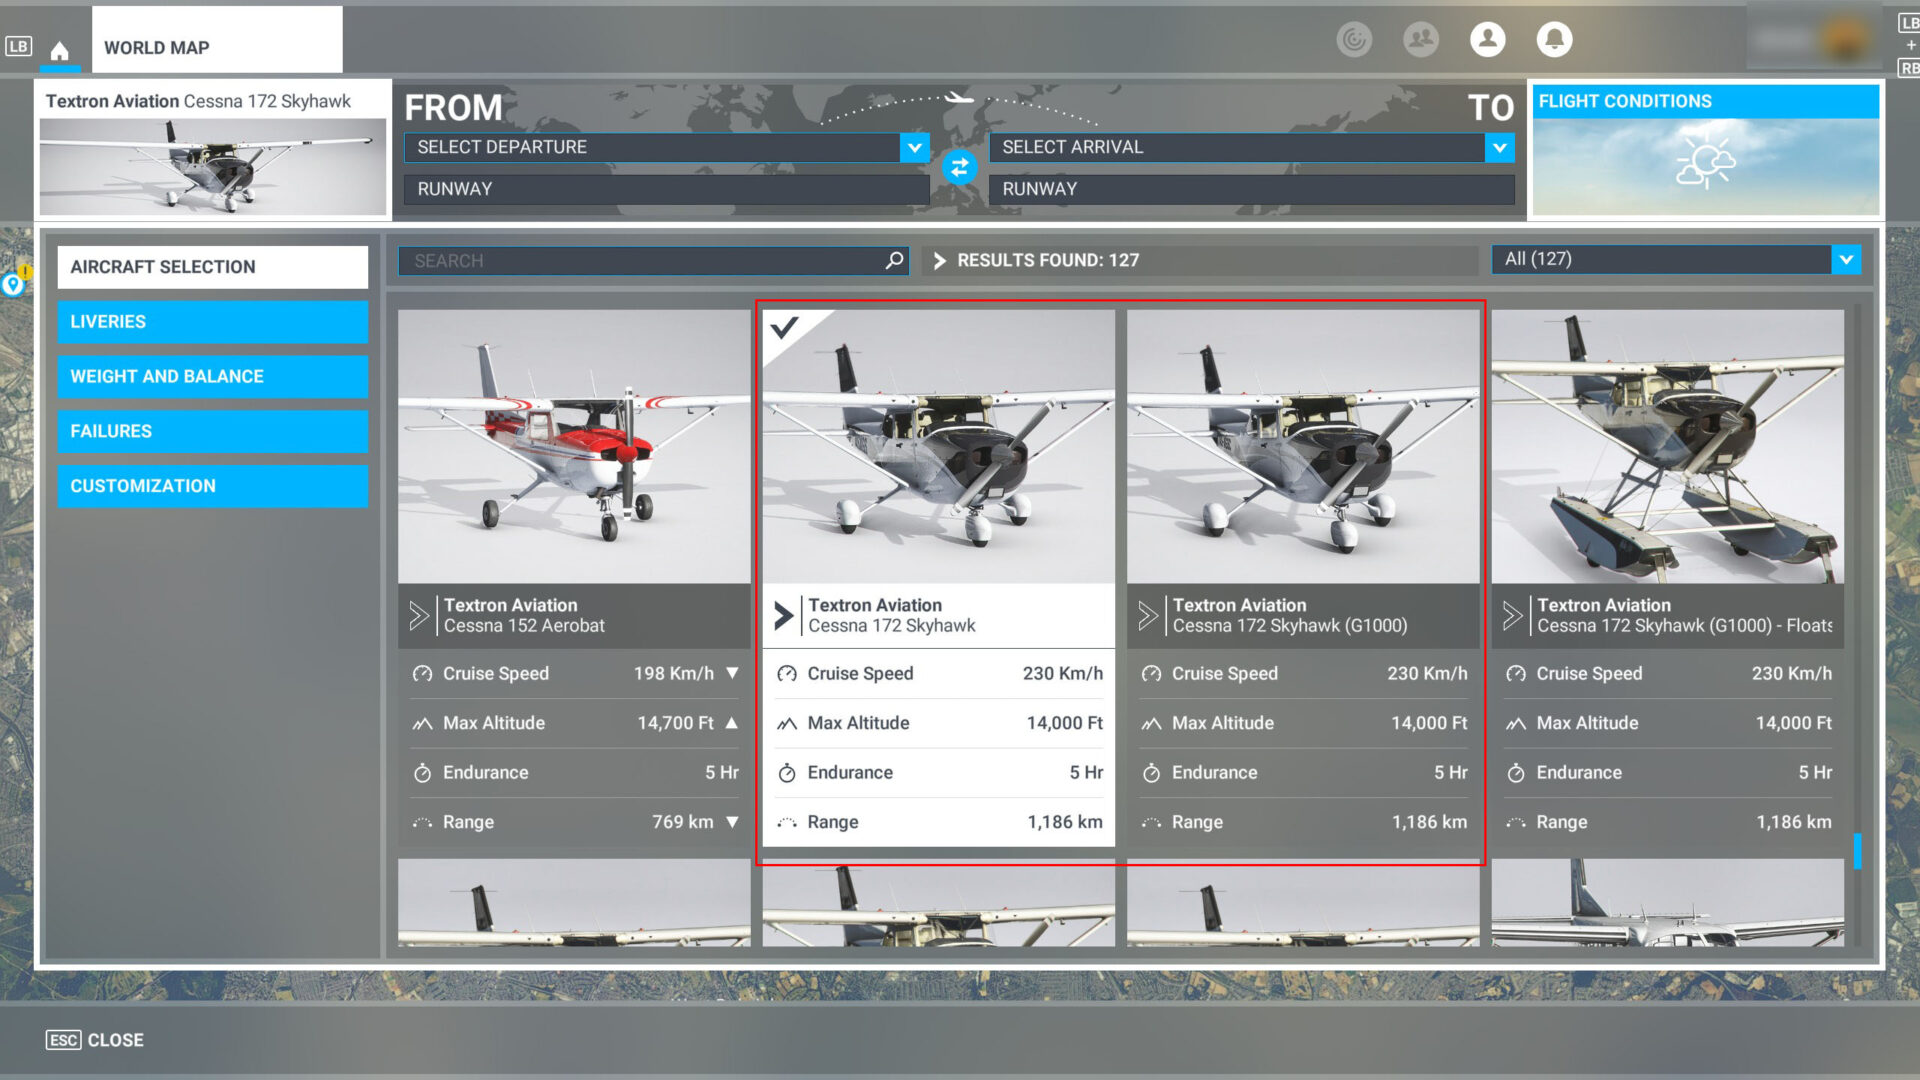
Today we’re taking the classic Cessna 172 Skyhawk out for a spin. While it isn’t the absolute most basic aircraft available in Microsoft Flight Simulator, it’s a good platform to learn, as it has just enough complexity to offer a complete experience and comes with both steam gauges and an optional advanced Garmin G1000 avionics suite to familiarize yourself with a glass cockpit.
First of all, let’s examine the difference. At a basic level, steam gauges are your classic needle instruments. They may be a bit more challenging to read, but they’re beloved by many as the traditional way to connect with your aircraft.
Glass Cockpits are more advanced, and they display most of the data you need on screens. They usually offer more information at a glance, and you could say that they hold your hand a bit more.
Learning Your Basic Instruments – Steam Gauges
Let’s start with the basic version of the Cessna 172, the one equipped with the Steam Gauges. In the aircraft selection, it’s simply labeled “Textron Aviation Cessna 172 Skyhawk.”
Here’s what the flight instruments look like. We’ll go from left to right.

1 – Fuel and Oil Indicators: These gauges indicate your remaining fuel, the fuel flow, the exhaust gas temperature, the oil temperature, and the oil pressure. We’ll look at these in more detail in our future article about engine management.
2 – Suction Gauge and Ammeter: the Suction Gauge (VAC) indicates the pressure of the system that operates the needles of your instruments. For the moment, you don’t need to worry about it, but it becomes relevant in case of failure.
The Ammeter (AMP) shows whether your battery is providing electricity to the system and discharging, or being recharged by the engine. We’ll examine this when we talk about engine management.
3 – Airspeed Indicator: this is basically your main lifeline, and arguably the most important instrument you have. In an aircraft, speed turns into lift, and if you don’t have enough, you’ll fall out of the sky.
In general, you should aim to keep your airspeed in the green band. If you go under 48 knots, you’ll stall (lose lift and start falling). Going over 127 knots (overspeeding) places you at risk of structural damage.
Keep in mind that Airspeed is your speed compared to the airflow (it’s a bit more complex than this, but we’ll keep it simple), and not your speed compared to the ground (ground speed).
4 – Turn and Slip Indicator: this instrument helps you keep your turns coordinated. It shows whether you’re flying directly into the airstream or you’re slipping left or right. When the ball is in the middle, your turn is correctly coordinated.
We’ll look at this more in-depth when we examine the flight controls and related techniques, but when you bank your aircraft to turn, you need to apply rudder to counteract the forces that would make you slip.
5 – Artificial Horizon: this basically shows the flight attitude of your aircraft compared to the ground and the sky. It’s critical, especially in low-visibility conditions.
If the aircraft (represented here by two lines indicating the wing and a dot in the middle indicating the fuselage) is in the blue part of the gauge, you’re pitched up (but not necessarily climbing, see the Vertical Speed Indicator below). If it’s in the brown part, you’re pitching down.
The indicator also displays the degrees of pitch and whether you’re banking, as shown by comparing the wings with the horizon line and the line and also with the notches at the top of the gauge.
6 – Compass: this does what it says on the tin, showing your heading. Most aircraft also carry a backup compass (indicated as 6a) that is used when your main compass fails. Redundancy is important in aviation.
7 – Altimeter: this gauge measures your altitude. The thin, long needle with the triangle at the end indicates tens of thousands of feet. The short, thick needle indicates thousands of feet. The medium, long needle indicates hundreds of feet. Together, they provide a detailed indication of you your altitude.
Do keep in mind that this is not your altitude over the ground, but over sea level, so if you’re flying over elevated terrain, you may be much closer to the ground than what your altitude may lead you to expect.
The small gauges to the left and the right are your altimeter calibration, operated with the small knob on the lower left. The small gauge on the right is Inches of Mercury (in.hg) primarily used in the US, and the one on the left is in millibar (mb), which is used in most of the rest of the world alongside the equivalent Hectopascal (hPA).
This value depends on the air pressure and is provided by air traffic control to correctly calibrate your altimeter depending on the environmental conditions. In Microsoft Flight Simulator, you can press “B” on the keyboard to “cheat” and set it automatically.
8 – Vertical Speed Indicator: this indicates whether you’re pitching or diving in feet per minute. If the needle points upward, you’re climbing, while if it points downward, you’re diving toward the ground. The further the needle deviates from its horizontal position, the steeper the climb or dive.
9: Tachometer: this gauge indicates your engine’s RPM (revolutions per minute). Each aircraft has ideal RPM ranges depending on a variety of factors. This is governed by your throttle and mixture control. We’ll examine this in detail in our article about engine management.
10 – Navigation Instruments: these are the instruments designed to help you navigate your route to your destination. Since they’re quite complex, we’ll examine them in a dedicated article focused on navigation.
Learning Your Basic Instruments – Glass Cockpit
Now we can move on to the version of the Cessna 172 with the glass cockpit. It’s indicated in the Aircraft Selection menu as “Textron Aviation Cessna 172 Skyhawk G1000).” The difference from the version with the steam gauges is that the cockpit is equipped with an advanced Garmin G1000 electronic flight instrument system (EFIS).
The EFIS includes a number of screens. On the Cessna 172, there are two, the primary flight display on the left and the multi-function display on the right.
They include all the information that you saw on the Steam Gauges version but displayed differently.
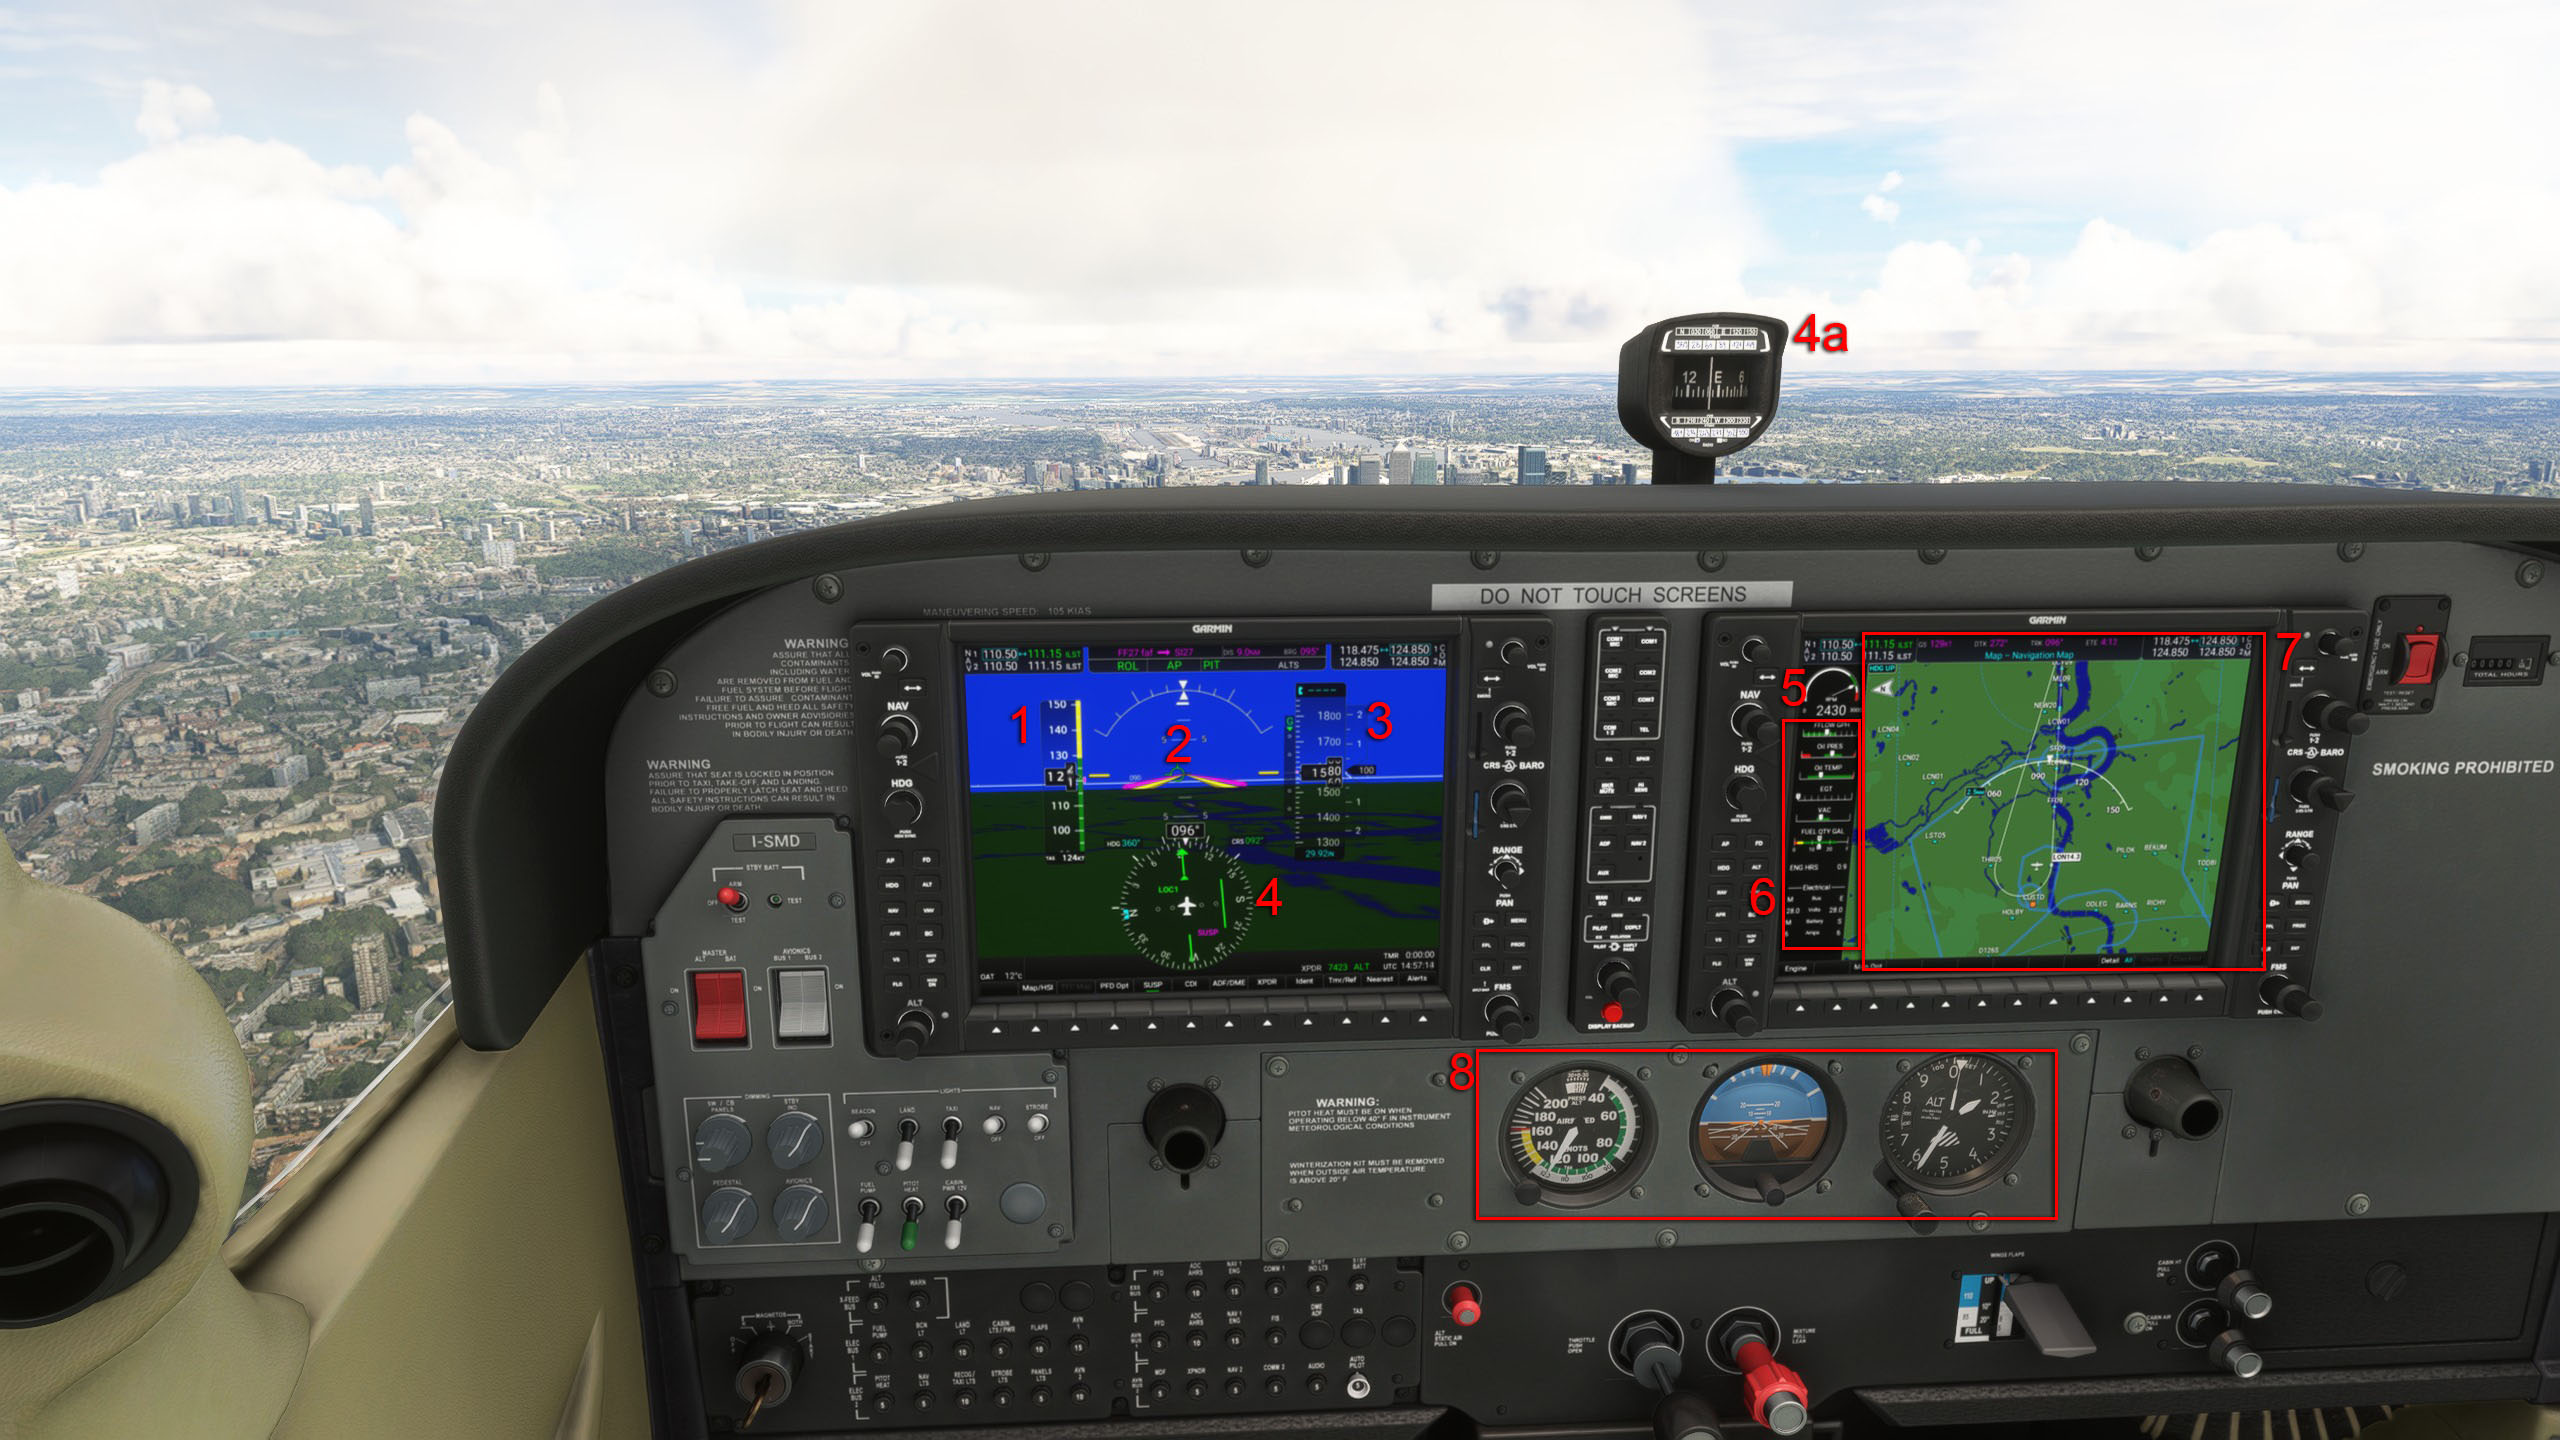
1 – Airspeed Indicator: it’s the same that we saw on the Steam Gauge, but displayed digitally on a ribbon.
2 – Artificial Horizon: again, it’s the same as in the steam gauge, but this time the ground is displayed synthetically in a more complex visualization.
3 – Altimeter and Vertical Speed indicator: your altitude above sea level is indicated on the right, while the vertical speed is on the left. Here you can see your altimeter calibration under the altitude ribbon in Inches of Mercury.
To change the unit to Hectopascals, you have to go into the settings of the display by pressing the button under “PFT Opt,” then “ALT Units,” and then “HPA.”
4 – Compass: It works exactly like in the Steam Gauges version, and you have an analog backup in case of malfunction indicated as “4a.”
5 – Tachometer: this also works the same as the Steam Gauge.
6 – Oil, Fuel, Suction Gauge, and Battery indicators: same as above, just a bit easier to read.
7 – Navigation Display: this is quite a bit simpler to read compared to the Steam Gauges version and more intuitive, but we’ll examine it in the article about navigation.
8 – Backup instruments: as mentioned above, in aviation redundancy is everything. If your displays malfunction, you have a backup speedometer, artificial horizon, and altimeter.
They are exactly the same as the ones equipped in the Steam Gauges version of the panel and they are designed to provide essential information without having to rely on the electronic displays.
If you have missed the first two articles of this series, you can check out our introductory guide, alongside our second article on how to download and install add-ons in Microsoft Flight Simulator.
If you’d like to keep up to date with the flight simulation news that comes out every day you can enjoy our daily roundup.


